Month: April 2024

  • Guide to cleaning stainless steel appliances

    Stainless steel appliances are popular in modern kitchens due to their sleek look and durability. However, they can be prone to streaks, fingerprints, and smudges, which can detract from their appearance. Here’s a guide to keeping your stainless steel appliances looking their best with proper cleaning and maintenance.

    Step 1: Gather Your Supplies

    Before you start cleaning your stainless steel appliances, you’ll need the following items:

    • Warm water
    • Mild dish soap
    • White vinegar or a specialized stainless steel cleaner
    • Microfiber cloths or soft cloths
    • Olive oil or baby oil (optional for polishing)

    Step 2: Wipe Down with Warm Water

    For daily cleaning, sometimes all that’s needed is a quick wipe with warm water.

    • Dampen a microfiber cloth with water.
    • Wipe the surface, following the grain of the stainless steel. Stainless steel has a grain much like wood – you’ll see lines or streaks in the metal.
    • Dry the appliance thoroughly with another clean microfiber cloth to prevent water spots.

    Step 3: Use Mild Dish Soap for Tougher Grime

    If your appliance has fingerprints or food spills:

    • Add a few drops of mild dish soap to warm water.
    • Dip your cloth into the soapy water and wring it out so that it’s not dripping.
    • Wipe the appliance, again going with the grain.
    • Rinse your cloth with clean water and wipe away any soap residue.
    • Dry the appliance completely with a clean cloth.

    Step 4: Tackle Stubborn Stains with Vinegar

    White vinegar is excellent for cleaning and disinfecting stainless steel, and it helps with removing hard water stains.

    • Spray white vinegar directly onto the appliance or apply it to a cloth.
    • Wipe along the grain of the stainless steel.
    • Rinse the area with water and dry it with a clean cloth.

    Step 5: Shine with a Specialized Cleaner

    For a more polished look, or if your appliance has stubborn smudges, you can use a specialized stainless steel cleaner.

    • Follow the instructions on the cleaner, as some may require you to spray it on a cloth first, while others can be applied directly to the appliance.
    • Apply the cleaner using light pressure, rubbing it along the grain.
    • Buff the appliance with a clean cloth to shine.

    Step 6: Polish (Optional)

    For extra shine, you can use a tiny amount of olive oil or baby oil.

    • Apply a small amount to a soft cloth.
    • Gently rub the oil into the appliance, following the grain.
    • Buff with a clean, dry cloth to remove any excess oil and create a gleaming finish.

    Additional Cleaning Tips:

    • Always clean with the grain of the stainless steel to avoid scratching or marring the finish.
    • Avoid using steel wool, scrubbing brushes, or any abrasive cleaners, which can permanently damage the surface.
    • Wipe up spills and splatters immediately to prevent them from setting in and causing discoloration or staining.
    • For added protection, you can use a stainless steel polish or protectant to help fend off fingerprints and stains.

    Regular Maintenance:

    To maintain the new and fresh look of your stainless steel appliances:

    • Clean them regularly, at least once a week, or as needed when spills occur.
    • Always use soft cloths to prevent scratches.
    • Remember to clean the handles and buttons, which are frequent touchpoints and can accumulate grime.
    • If you live in an area with hard water, be mindful of water spots and clean them more frequently.

    Keeping your stainless steel appliances clean and smudge-free is not only about maintaining the aesthetics of your kitchen but also about preserving the lifespan and functionality of your appliances. By following the steps above, you’ll ensure your stainless steel surfaces remain sleek and shiny for years to come.
  • A Comprehensive Guide to Selecting and Sizing the Correct Sump Pump


    Sump pumps are crucial devices for maintaining dry basements and preventing flooding in homes. Selecting the right sump pump and ensuring it’s appropriately sized for your needs can be the difference between a dry basement and a costly water damage disaster. In this guide, we’ll explore the factors to consider when choosing and sizing a sump pump to safeguard your property.

    Understanding Sump Pumps:
    A sump pump is a submersible pump placed in a sump pit, typically found in basements or crawl spaces. Its primary function is to pump out excess water that accumulates around a building’s foundation, preventing flooding and water damage. There are two main types of sump pumps: pedestal and submersible. Pedestal pumps have the motor mounted above the sump pit, while submersible pumps are designed to operate underwater.

    Factors to Consider When Selecting a Sump Pump:

    1. Pump Type: Determine whether a pedestal or submersible pump is more suitable for your application. Submersible pumps are generally quieter and more aesthetically pleasing since they are hidden within the sump pit.
    2. Pump Capacity: Consider the amount of water your sump pump needs to handle. This is typically measured in gallons per hour (GPH) or gallons per minute (GPM). Calculate the pump capacity based on factors such as basement size, local rainfall intensity, and drainage conditions.
    3. Pump Power Source: Sump pumps can be powered by electricity or battery backup systems. Electric pumps are reliable but may fail during power outages, making battery backup systems essential for areas prone to storms or unreliable power grids.
    4. Pump Features: Look for features like automatic float switches, which activate the pump when water levels rise, and built-in alarms to alert you of pump malfunctions or high water levels.
    5. Durability and Warranty: Invest in a high-quality pump with a durable construction and a reliable warranty to ensure long-term performance and peace of mind.

    Sizing the Sump Pump:
    Proper sizing is critical to ensure your sump pump can effectively manage water infiltration. Follow these steps to determine the correct pump size:

    1. Measure the area of your basement or crawl space in square feet.
    2. Estimate the depth of water infiltration during heavy rainfall or flooding events.
    3. Calculate the volume of water that needs to be pumped out by multiplying the area by the depth.
    4. Determine the pump capacity required to handle this volume of water within a reasonable time frame, considering factors like pump efficiency and drainage conditions.

    Maintenance and Installation Tips:
    Once you’ve selected and sized the correct sump pump for your needs, proper installation and maintenance are essential to ensure optimal performance:

    1. Install the pump in the lowest part of the basement or crawl space, preferably in a dedicated sump pit.
    2. Ensure the discharge pipe directs water away from the foundation to prevent water from recirculating.
    3. Test the pump regularly by pouring water into the sump pit and observing its operation.
    4. Clean the pump and sump pit regularly to prevent debris buildup and clogging.
    5. Schedule annual inspections and maintenance checks by a qualified technician to identify and address any issues early on.

    Conclusion:

    Choosing and sizing the correct sump pump is crucial for protecting your home from water damage and maintaining a dry, habitable space. By considering factors such as pump type, capacity, power source, features, and durability and following proper installation and maintenance practices, you can ensure your sump pump functions reliably when needed. Don’t wait until it’s too late—invest in the right sump pump today to safeguard your property against flooding and water infiltration.

    Here are some of our recommendations

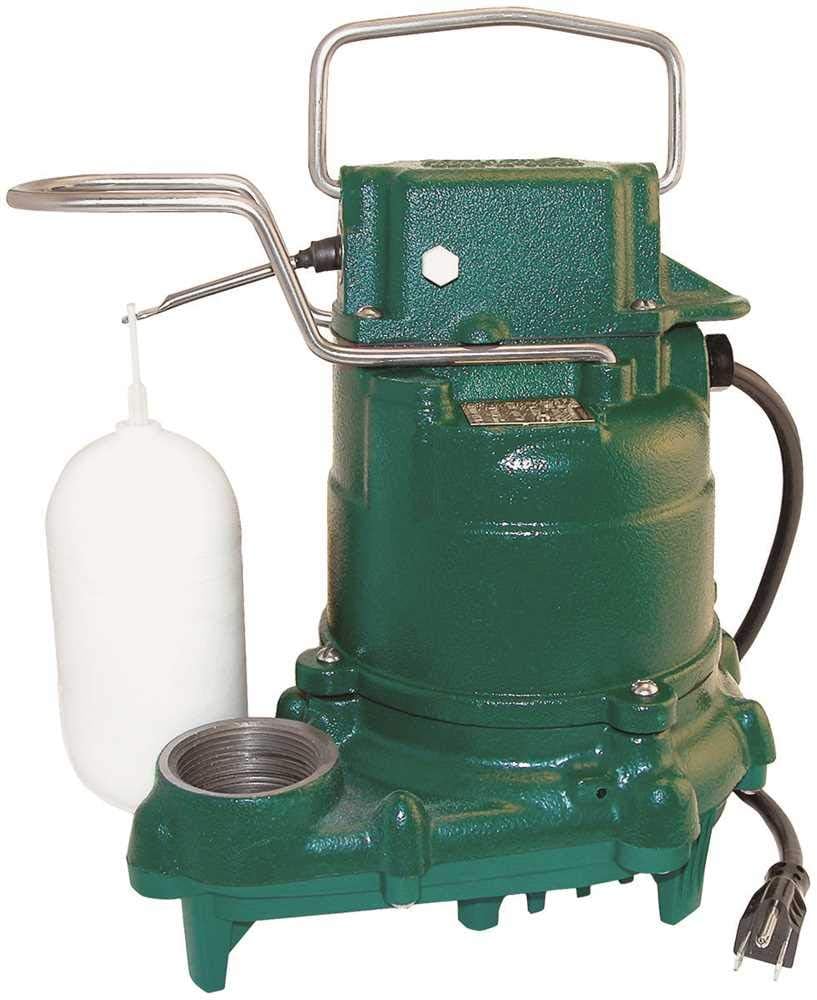
    Zoeller 53-0001 1/3 HP 43 GPM 1-1/2-Inch Discharge M53

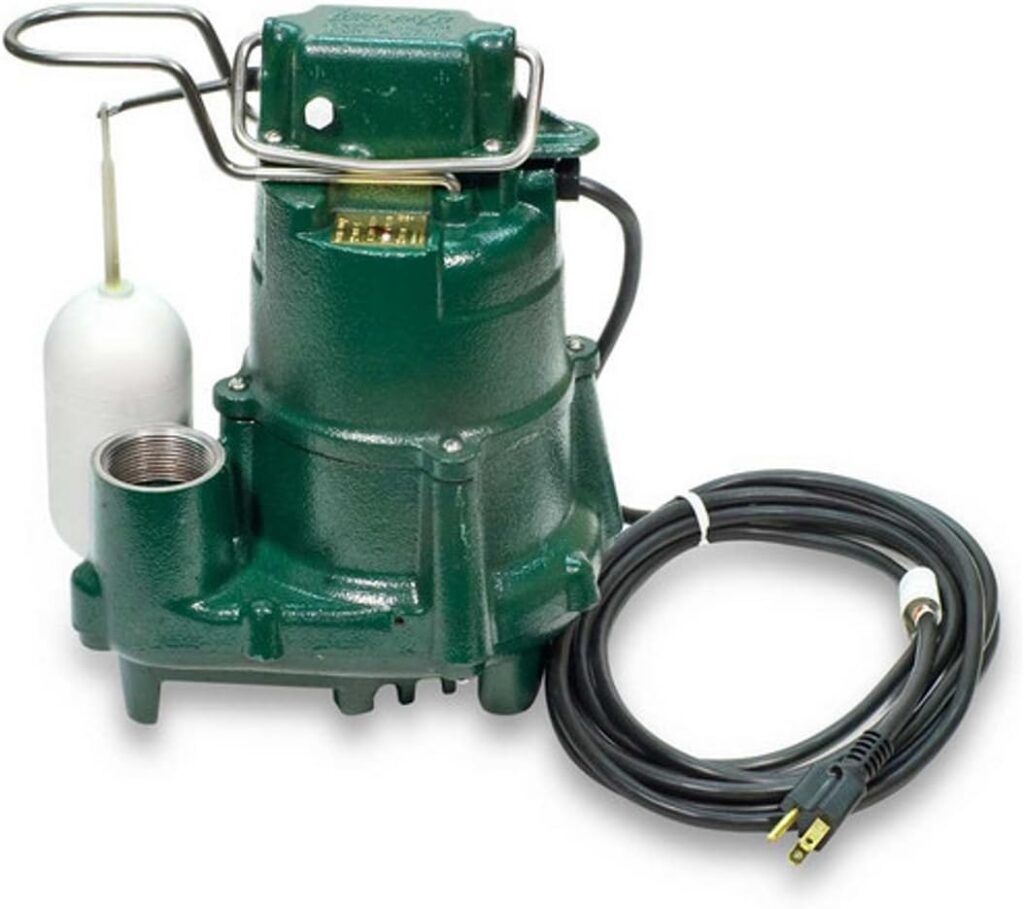
    Zoeller 98-0001 1/2 HP 72 GPM 1-1/2-Inch Discharge M98

  • Eco-friendly kitchen cleaning solutions

    As concern for the environment grows, many homeowners are looking for ways to reduce their ecological footprint, starting with how they clean their kitchens. Traditional cleaning products often contain chemicals that can harm the environment and human health. Fortunately, there are numerous eco-friendly kitchen cleaning solutions that are just as effective as conventional cleaners, but with the added benefit of being safe for the planet. In this article, we’ll explore some practical, green methods for keeping your kitchen spotless.

    1. Homemade All-Purpose Cleaner

    One of the simplest ways to ensure your cleaning products are eco-friendly is to make them yourself. A basic all-purpose cleaner can be made by combining the following ingredients in a spray bottle:

    • 1 part white vinegar
    • 1 part water
    • Optional: A few drops of essential oil for fragrance (like lemon or tea tree)

    This mixture is great for cleaning countertops, appliance surfaces, and even floors. The vinegar acts as a natural disinfectant without the harmful effects of bleach.

    2. Baking Soda for Scrubbing

    Baking soda has long been a household staple, and it’s also a fantastic eco-friendly scrubbing agent. Sprinkle baking soda onto tough stains or grime, then scrub with a damp cloth or sponge. For extra cleaning power, you can make a paste with water and let it sit before scrubbing.

    3. Lemon for Freshness and Shine

    Lemon isn’t just good for lemonade – it’s a great natural cleaner due to its acidity and pleasant scent. Use lemon halves to rub down chopping boards and surfaces to sanitize and deodorize them. Lemon can also be used to polish metal surfaces such as faucets and sink basins.

    4. Castile Soap for Dishes and Surfaces

    Castile soap is a biodegradable, vegetable-based soap that can be used for a variety of cleaning tasks in the kitchen. Mix a small amount of castile soap with water to create a gentle yet effective cleaner for dishes, surfaces, and even your hands.

    5. Steam Cleaning

    Sometimes, water is all you need – especially if it’s steam. Invest in a good quality steam cleaner to sanitize and clean your kitchen without any chemicals at all. Steam is effective at breaking down grease and grime in ovens, on stovetops, and across countertops.

    6. Reusable Cleaning Cloths

    Instead of using disposable paper towels, switch to reusable cloths that can be washed and used time and time again. Microfiber cloths are particularly good for cleaning as they’re designed to trap dust and dirt effectively.

    7. Sustainable Cleaning Brushes and Sponges

    When it comes to scrubbing, opt for eco-friendly alternatives like brushes with sustainable bamboo handles and sponges made from natural materials like cellulose or coconut fibers.

    8. Eco-friendly Commercial Cleaners

    If making your own cleaning solutions isn’t your thing, there are many commercial eco-friendly cleaning products available. Look for brands with transparent ingredient lists, free from harsh chemicals like phosphates, chlorine, and artificial fragrances. Products with certification from organizations like the Environmental Working Group (EWG) or Green Seal are generally good choices.

    9. Proper Disposal of Grease and Oils

    Be mindful of how you dispose of cooking grease and oils, as pouring them down the sink can result in clogged pipes and environmental damage. Instead, collect grease in a container and dispose of it in the trash, or find a local recycling center that accepts oils.

    Conclusion

    By incorporating these eco-friendly cleaning solutions into your kitchen routines, you not only contribute to a healthier environment but also can enjoy a safe, clean space for cooking and eating. Regular maintenance and mindful practices are key to a sustainable lifestyle, and every small step can make a significant impact. Remember that simplicity often trumps complexity when it comes to environmental sustainability, and many of these methods have been used for generations, proving that sometimes, the old ways can indeed be the best ways.

  • Integrating smart assistants with kitchen devices

    As technology continues to advance at a breathtaking pace, the dream of a fully connected smart home is closer than ever. One of the most compelling areas of innovation is the kitchen, where smart assistants are being integrated with kitchen devices to make cooking and meal prep easier, more efficient, and even more enjoyable. If you’re looking to modernize your culinary space, here’s a guide on how to integrate smart assistants with your kitchen gadgets.

    Step 1: Choose Your Smart Assistant

    Before you start upgrading your kitchen appliances, you need to choose a smart assistant platform. The most popular ones are:

    • Amazon Alexa
    • Google Assistant
    • Apple’s Siri (through HomeKit)

    Consider compatibility with devices you already own, the ecosystem you’re invested in (Amazon, Google, Apple, etc.), and the specific features that are most important to you.

    Step 2: Make Sure You Have a Reliable Wi-Fi Connection

    Your smart kitchen devices will need a strong and reliable Wi-Fi connection to communicate with each other and with your smart assistant. Ensure that your router is of good quality and can handle multiple devices. If you have connectivity issues, consider investing in a Wi-Fi extender or mesh network system.

    Step 3: Smart Plugs Can Make Dumb Devices Smart

    If you have kitchen appliances that you’re not ready to replace, smart plugs can be the perfect solution. These plugs insert into your regular outlets and can be turned on or off via your smart assistant. That way, you can control devices like your coffee maker or slow cooker with voice commands or through an app.

    Step 4: Upgrade to Smart Appliances

    Many modern kitchen devices come with smart capabilities built-in. Look for appliances that are compatible with your chosen smart assistant:

    • Smart Refrigerators can track expiration dates, create shopping lists, and even feature internal cameras so you can see what’s inside while you’re away from home.
    • Smart Ovens can preheat remotely, adjust temperature with voice commands, and notify you when your dish is done.
    • Smart Dishwashers let you start or schedule cycles through an app or voice commands, and they can alert you when they need more rinse aid or a filter change.
    • Smart Coffee Makers can be scheduled to have your morning brew ready when you wake up and can be activated from anywhere.

    Step 5: Utilize Smart Home Hubs or Apps

    For seamless integration, consider using a smart home hub that’s compatible with all your devices or at least one central app. These hubs or apps consolidate control of your devices into one interface, making it easier to set routines and control your kitchen.

    Step 6: Set Up Routines and Scenes

    Most smart assistants allow you to create routines or scenes – these are a series of actions that are triggered by a single command. For example:

    • A “Good Morning” routine could turn on your smart coffee maker, start playing some light music through a smart speaker, and display the day’s weather on a smart screen.
    • A “Dinner Time” routine might preheat the oven, start the dishwasher, and set the mood by dimming the smart lights in the dining area.

    Step 7: Keep Security in Mind

    As with any smart home devices, security is a concern. Always ensure your Wi-Fi network is secure, use strong, unique passwords for your smart home accounts, and regularly check for and install updates to your devices’ firmware.

    Step 8: Explore the Fun Extras

    Finally, explore other smart devices and features to enhance your kitchen experience. Smart scales can help with precise measurements, smart faucets can dispense exact amounts of water, and intelligent kitchen gadgets like smart blenders or sous vide machines are perfect for the tech-savvy gourmet.

    In conclusion, integrating smart assistants with your kitchen devices not only can make cooking and meal prep simpler but also adds a layer of enjoyment to the overall experience. As you dip your toes into the smart kitchen world, you’ll discover a whole new way to interact with the heart of your home. Keep in mind that the landscape of smart home technology is ever-evolving, so stay informed about new advancements and think of your smart kitchen as a work in progress—always ready for the next delicious update.